This document walks through a specimen answer to this exercise. Read each code section and its numbered explanations below. Select the number at the start of each explanation to highlight the line of code that explanation relates to.
In R, like in many programming languages, there is usually more than one way to complete a task. This code shows one way to complete this exercise. There are other ways to organise this code that are equally good and achieve the same result, but the code below tries to balance making the code efficient with making it easy to read. If your code is different from the code here, read through the notes below the answer and use those to decide whether you prefer your own approach or the specimen answer below. You can also use the notes to improve your own code.
WarningThe specimen answer expects your computer to be set up as outlined in the book.
<httr2_response>
GET https://mpjashby.github.io/crimemappingdata/london_attacks.csv
Status: 200 OK
Content-Type: text/csv
Body: On disk '/Users/mattashby/Documents/Crime Mapping Book/exercises/data/raw/london_attacks.csv' (602 bytes)
Rows: 8 Columns: 4
── Column specification ────────────────────────────────────────────────────────
Delimiter: ","
chr  (1): description
dbl  (2): latitude, longitude
date (1): date

ℹ Use `spec()` to retrieve the full column specification for this data.
ℹ Specify the column types or set `show_col_types = FALSE` to quiet this message.
NoteView the complete R script
# Map recorded fatal terrorist attacks in London from 2010 to 2018.# Load packagespacman::p_load(here, httr2, sf, sfhotspot, tidyverse)# Download the original data and keep a local copyrequest("https://mpjashby.github.io/crimemappingdata/london_attacks.csv") |>req_perform(path =here("data", "raw", "london_attacks.csv"))# Read dataattacks <-here("data", "raw", "london_attacks.csv") |>read_csv()# Keep only records within the requested date range, including both endsattacks_filtered <-filter(attacks, date >="2010-01-01", date <="2018-12-31")# Convert longitude and latitude to a spatial objectattacks_sf <-st_as_sf( attacks_filtered,coords =c("longitude", "latitude"),crs ="EPSG:4326")# Transform to a projected coordinate reference system suitable for Londonattacks_sf_trans <-st_transform(attacks_sf, crs ="EPSG:27700")# Display the maphotspot_map( attacks_sf_trans,basemap_type ="cartolight",colour ="red2",size =5)
1# Map recorded fatal terrorist attacks in London from 2010 to 2018.
1
Start by explaining what the script does. In this case the comment identifies the type of crime, the place and the date range, so that it will be easier to find the script if we want to use it again later. See Organising code with comments.
pacman::p_load() loads the packages needed for this analysis, listed in alphabetical order with the tidyverse package last. here allows us to specify where to find files in the workspace; httr2 downloads data from the internet; sf handles spatial objects; sfhotspot creates crime maps and estimates density; tidyverse provides tools for reading, wrangling and plotting data. Loading packages at the start makes it easy to check which tools the script needs. See Loading packages.
Step 3: Download the original data
# Download the original data and keep a local copy3request("https://mpjashby.github.io/crimemappingdata/london_attacks.csv") |>4req_perform(path =here("data", "raw", "london_attacks.csv"))
3
request() specifies the URL of the file to download. The pipe operator (|>) passes that request to the next function. This exercise uses one CSV file containing the locations of fatal terrorist attacks in London. See Downloading and loading data; Stringing functions together.
4
req_perform() performs the download. here() specifies where the original file should be saved, relative to the crime_mapping workspace. Keeping the original data in data/raw means we can return to it if we make a mistake while wrangling the data. See Keeping your files organised.
here() specifies the path to the downloaded CSV file within the workspace. The pipe (|>) passes this path to read_csv().
6
read_csv() from readr reads the local CSV file. here() specifies which file to read, while <- stores the result as attacks. Keeping this step separate from filtering makes it easy to inspect the original data if we need to check it. See Loading CSV data; Naming objects.
Step 5: Select the requested dates
# Keep only records within the requested date range, including both ends7attacks_filtered <-filter(attacks, date >="2010-01-01", date <="2018-12-31")
7
filter() from dplyr keeps rows from attacks that satisfy both conditions. >= includes 1 January 2010 and later dates, while <= includes 31 December 2018 and earlier dates. The result is stored as attacks_filtered. We filter by date because the exercise asks for 2010–2018; we do not need a second filter for fatalities because the supplied file already contains fatal attacks. See Filtering rows.
Step 6: Describe the original coordinates
# Convert longitude and latitude to a spatial object8attacks_sf <-st_as_sf(9 attacks_filtered,10coords =c("longitude", "latitude"),11crs ="EPSG:4326")
8
st_as_sf() creates a spatial object and stores it as attacks_sf. This tells R that the coordinate columns describe locations on the Earth’s surface. See Converting data to an SF object.
9
Use the filtered records, rather than the original data, so that only attacks within the requested period are mapped.
10
coords names the columns containing the x and y coordinates, in that order. Here the x coordinate is longitude and the y coordinate is latitude.
11
crs = "EPSG:4326" specifies how R should interpret the existing longitude and latitude values. It does not transform those coordinates into a different system.
Step 7: Transform the coordinates
# Transform to a projected coordinate reference system suitable for London12attacks_sf_trans <-st_transform(attacks_sf, crs ="EPSG:27700")
12
st_transform() converts the coordinates in attacks_sf to the British National Grid, a projected CRS suitable for London. Unlike the previous step, this changes the coordinates themselves. The result is stored as attacks_sf_trans. See Transforming the coordinate reference system.
Step 8: Draw the map
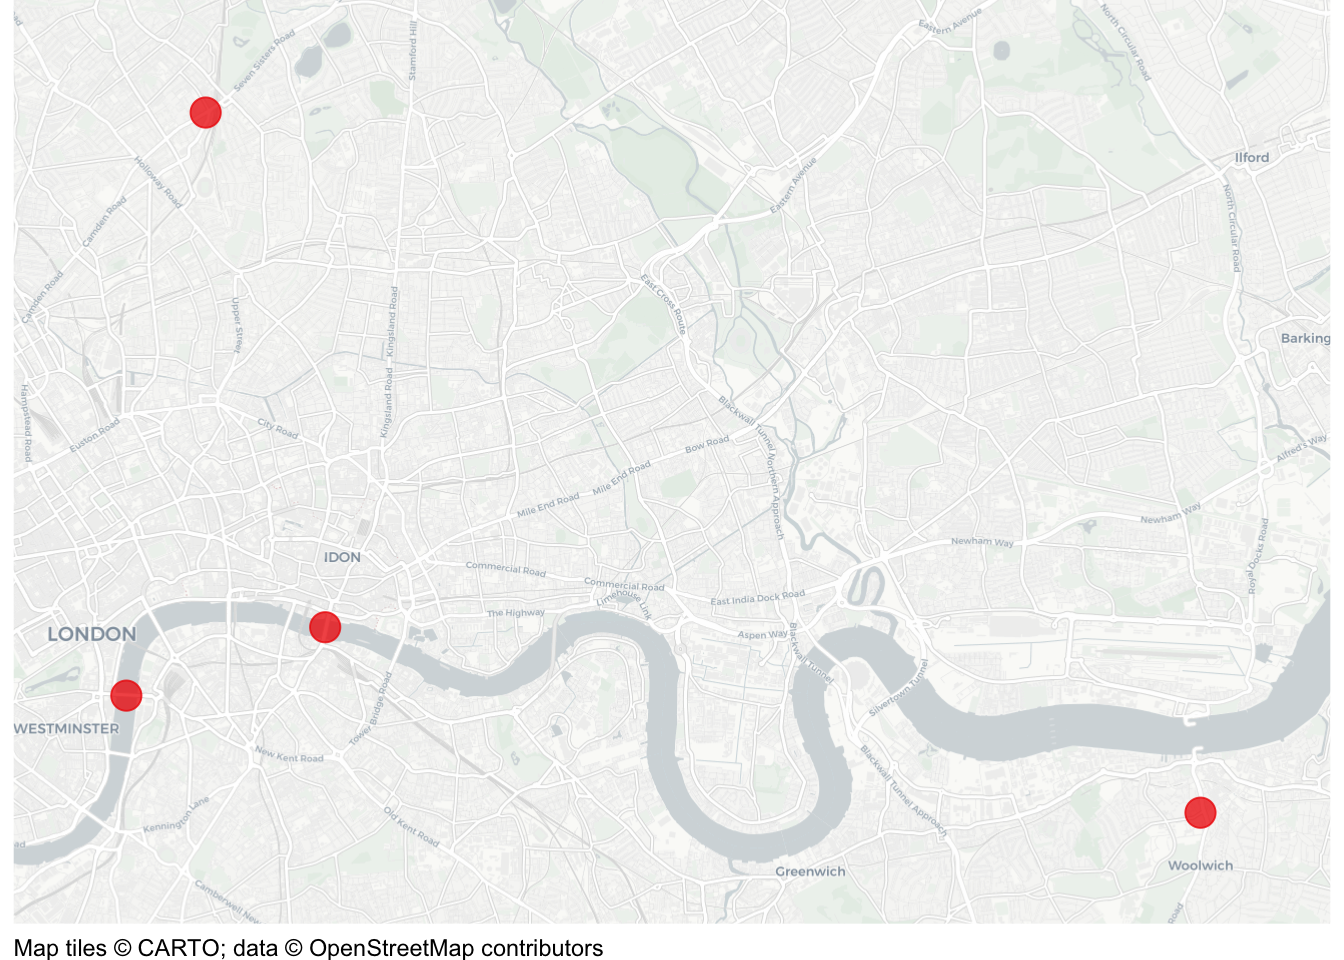
# Display the map13hotspot_map(14 attacks_sf_trans,15basemap_type ="cartolight",16colour ="red2",17size =5)
13
hotspot_map() plots the spatial data over a base map. Leaving the result unassigned means running this final expression displays the map. Different choices of colour and point size could also produce a good answer. See Drawing the map.
14
Use the transformed spatial object, which contains only the records selected earlier.
15
A light cartolight base map helps readers locate the attacks without distracting from the points. See Base maps.
16
Use red points to give the attacks a strong contrast with the light base map. The points should be more prominent than the streets beneath them. See Visual hierarchy.
17
Set the point size to 5 so that these relatively few incidents can be seen clearly. A size that works for this map might obscure the pattern in a dataset containing thousands of incidents. See Controlling aesthetics.